Views: 0 Author: Site Editor Publish Time: 2026-08-20 Origin: Site


Untreated ceilings are the primary culprit for poor speech intelligibility and echoing in commercial spaces. Sound waves bounce off hard structural surfaces uncontrollably. They create a chaotic auditory environment for employees, clients, and visitors. However, selecting the right acoustic panels ceiling installation method remains a high-stakes decision. You must balance optimal acoustic performance, labor efficiency, lease compliance, and stringent overhead safety codes.
This comprehensive guide evaluates the three primary ceiling installation methodologies available today. We dive deep into direct-fix, suspension, and grid mounting applications. We provide the exact technical criteria you need. You will learn how to accurately scope, specify, and execute an architectural acoustics project. By mastering these installation principles, you ensure maximum sound absorption while maintaining structural integrity and building code compliance.
A successful acoustic intervention begins long before you mount the first panel. You must evaluate the physical and legal constraints of your project site. A thorough site audit dictates your hardware choices. It also prevents catastrophic installation failures.
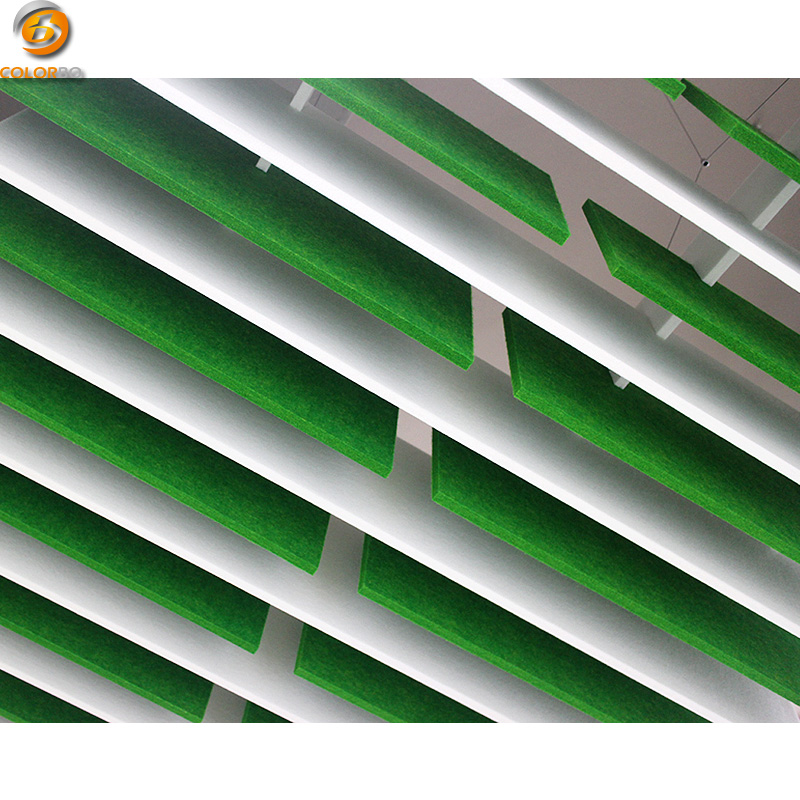
Direct-fix installations involve mounting acoustic panels flush against the drywall or concrete substrate. This method preserves vertical space. It serves as the standard approach for rooms struggling with low clearance.
Adhesive mounting offers a seamless, hardware-free aesthetic. It relies on industrial-strength glue to bond panels directly to the ceiling deck. This approach proves best for permanent installations, tight budgets, and extremely low-clearance ceilings where suspension is physically impossible.
However, implementation carries specific risks. You face a high risk of substrate damage upon removal. Tearing glued panels off drywall usually destroys the underlying paper face. You also require construction-grade, VOC-compliant adhesives suited for your specific panel material. Certain glues melt foam or fail to bond with compressed fiberglass. Always test adhesive compatibility before executing a full-room rollout.
Mechanical fastening utilizes specialized hardware to secure panels to the ceiling. This approach proves best for heavier panels. It also suits environments where adhesive failure poses a severe safety risk, such as over workstations or pedestrian walkways.
You can execute the "without damage" approach by utilizing specialized minimal-drilling brackets. Hardware like Z-clips or impaling spikes leaves a minimal footprint. This caters perfectly to lease compliance regulations. When you remove the panels, you only need to patch a few small screw holes.
Scalability for mechanical fastening remains moderate. It requires precise measuring and leveling. Your installation team must align mounting clips perfectly to achieve a professional, flush finish.
Mounting Method Comparison
| Feature | Adhesive Mounting (Glue-Up) | Mechanical Fasteners (Clips) |
|---|---|---|
| Substrate Impact | High damage upon removal | Minimal damage (small screw holes) |
| Installation Speed | Fast and straightforward | Moderate (requires precise leveling) |
| Ideal Environment | Permanent ownership, low ceilings | Leased spaces, heavy acoustic panels |
| Safety Security | Vulnerable to humidity and gravity over time | Highly secure; mechanically locked in place |
Suspended installation involves dropping panels from the primary ceiling deck. Installers utilize aircraft cable, chain, or rigid rod systems. This approach creates visually striking acoustic clouds and vertical sound baffles.
Suspending materials dramatically enhances sound absorption. Suspended acoustic ceiling baffles and clouds absorb sound on both faces (top and bottom). By exposing the rear side of the material, you functionally double the Noise Reduction Coefficient (NRC) per square foot. The air gap trapped above the panels also captures low-frequency reverberations effectively.
Overhead rigging demands professional-grade hardware and absolute precision. A failure here causes severe property damage or personal injury.
Suspended systems face unique environmental challenges. They remain highly susceptible to swaying from HVAC airflow. If not properly tensioned, baffles can swing and bump into one another. To prevent this, installers sometimes use rigid threaded rods instead of flexible cables near high-velocity air registers. Additionally, this method requires higher labor costs. Teams need laser-leveling tools, scaffolding, or scissor lifts to execute the rigging safely.
Grid mounting leverages existing architectural infrastructure. You utilize existing ceiling grids to hold acoustic panels. Installers accomplish this by either replacing existing tiles or snapping new panels directly onto the T-bar track.
The standard drop ceiling uses a 15/16-inch or 9/16-inch metal grid. This framework typically holds cheap, highly reflective mineral board tiles. The easiest acoustic upgrade involves a direct lay-in replacement. You swap the reflective mineral tiles for lightweight, high-NRC acoustic ceiling panels. This instantly transforms the acoustic profile of the room without altering the underlying grid framework.
Sometimes you cannot remove the existing tiles due to insulation requirements. In these cases, you deploy snap-on or magnetic systems. Installers use proprietary clips or heavy-duty magnets. These attachments secure directly to the exposed metal grid. You install acoustic baffles or clouds underneath the existing ceiling without removing a single tile.
Scalability: Grid mounting offers extremely high scalability. It provides the fastest installation time among all methods. You achieve zero substrate damage. One facility management team can retrofit an entire office floor in a single weekend.
Risk: You must verify structural integrity before proceeding. Check if the existing grid's suspension wires are rated for the added weight. Heavy acoustic tiles can overload standard 12-gauge suspension wires. This becomes exceptionally critical in active seismic zones where building codes mandate independent tie-offs for heavy overhead fixtures.
Installing materials directly above human occupants requires rigorous adherence to safety standards. Building inspectors heavily scrutinize overhead installations.
Overhead materials pose a significant fire spread risk. Ceilings act as horizontal highways for flames during a building fire. You must specify Class A materials. Using fireproof PET ceiling panels or similarly rated fiberglass ensures strict building code compliance. These materials pass the ASTM E84 standard for flame spread and smoke development. You must absolutely avoid cheap, unrated polyurethane acoustic foams, which act as accelerants in a fire.
In relevant jurisdictions, overhead installations require independent seismic bracing. This applies especially to suspended and grid-mounted systems. Earthquakes subject ceilings to violent lateral forces. You must install independent seismic tie-offs attached directly to the true structural deck. This prevents structural collapse and mitigates severe legal liability during a seismic event.
Evaluate material stability in humid or temperature-fluctuating environments. Non-climate-controlled spaces cause standard panels to absorb moisture. They gain weight and begin bowing over time. Specify moisture-resistant PET or rigid fiberglass boards to prevent unsightly panel sag. Keep ambient humidity levels consistently below 70% to preserve panel integrity.
Compliance and Risk Mitigation Chart
| Risk Factor | Standard Requirement | Mitigation Strategy |
|---|---|---|
| Fire Spread | ASTM E84 Class A Rating | Install certified fireproof PET panels or treated mineral wool. |
| Seismic Activity | CISCA Seismic Zones D, E, F | Utilize independent structural tie-off wires for heavy panels. |
| Moisture / Humidity | Zero structural bowing | Deploy rigid, non-hygroscopic materials in damp environments. |
| MEP Interference | 18-inch minimum clearance | Map sprinkler heads accurately; custom-cut panels to clear hazards. |
Selecting the optimal mounting system depends entirely on your specific architectural context. Use this decision framework to finalize your rollout strategy.
Next Steps: Conduct a thorough acoustic audit of your target room. Review ceiling structural blueprints to identify load-bearing concrete joists. Order physical sample materials immediately. Test your chosen adhesive compatibility on a small patch of drywall, or practice clip alignment to gauge labor timelines.
The success of any acoustic ceiling project hinges entirely on matching the installation method to the building's specific realities. Direct-fix, suspension, and grid methodologies each serve distinct structural environments. You must evaluate your ceiling height, load capacity, and lease restrictions carefully before buying materials.
Safety must remain your paramount concern. Cutting corners on overhead mounting hardware introduces unacceptable physical risk and legal liability. Always adhere strictly to Class A fire codes and local seismic regulations. Proper planning ensures your installation looks stunning, absorbs sound perfectly, and remains securely attached for decades.
Ready to silence the echo in your facility? Contact a professional acoustic engineering team today for a comprehensive blueprint review. They will provide targeted material samples and deliver project-specific mounting hardware recommendations tailored to your exact architectural needs.
A: True "zero damage" remains rare, but "minimal repair" is highly achievable. Utilizing mechanical track systems, Z-clips, or specialized temporary adhesives reduces impact. You will likely need to patch small screw holes upon removal, making it a safe choice for leased properties.
A: The ideal air gap ranges between 3 to 12 inches minimum. Leaving this gap behind the baffle traps low-frequency sound waves effectively. You must balance this acoustic physics requirement against your existing lighting constraints and overhead HVAC clearances.
A: Glue handles lightweight foam panels well, but it poses risks over time. Gravity and humidity degrade adhesive bonds eventually. We strongly recommend mechanical backups, like impaling clips, for any overhead installation over a specific weight threshold to ensure absolute safety.
A: No. Strict fire code mandates require a minimum 18-inch clearance below sprinkler heads. You must accurately map all MEP fixtures and custom-cut acoustic panels around them. Obstructing lights or fire suppression systems violates building codes and endangers occupants.